

Question:
How do I use Modern Authentication or OAuth with Connect to Mail and a Google accounts?
Solution:
For a smooth use of Connect to Mail with Google accounts via OAuth, we require a Google Workspace Business plan.
Please also note that for each folder you want to monitor with Connect to Mail, you need a new project with a fresh set of Google OAuth 2.0 Client ID and Client Secret.
We will guide you through the necessary steps with this KBA:
1. First, please go to https://console.cloud.google.com/apis
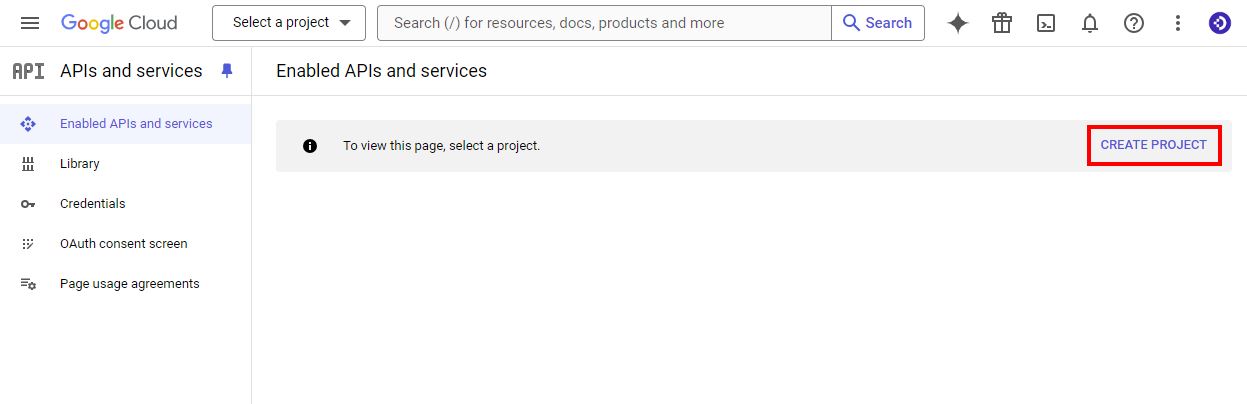
2. Create a project for OAuth in connection with DocuWare. To avoid confusion when creating multiple folder monitors, we recommend including the name of the mailbox and the folder to be monitored in the name. If you have not yet created a project, the interface will look like this:
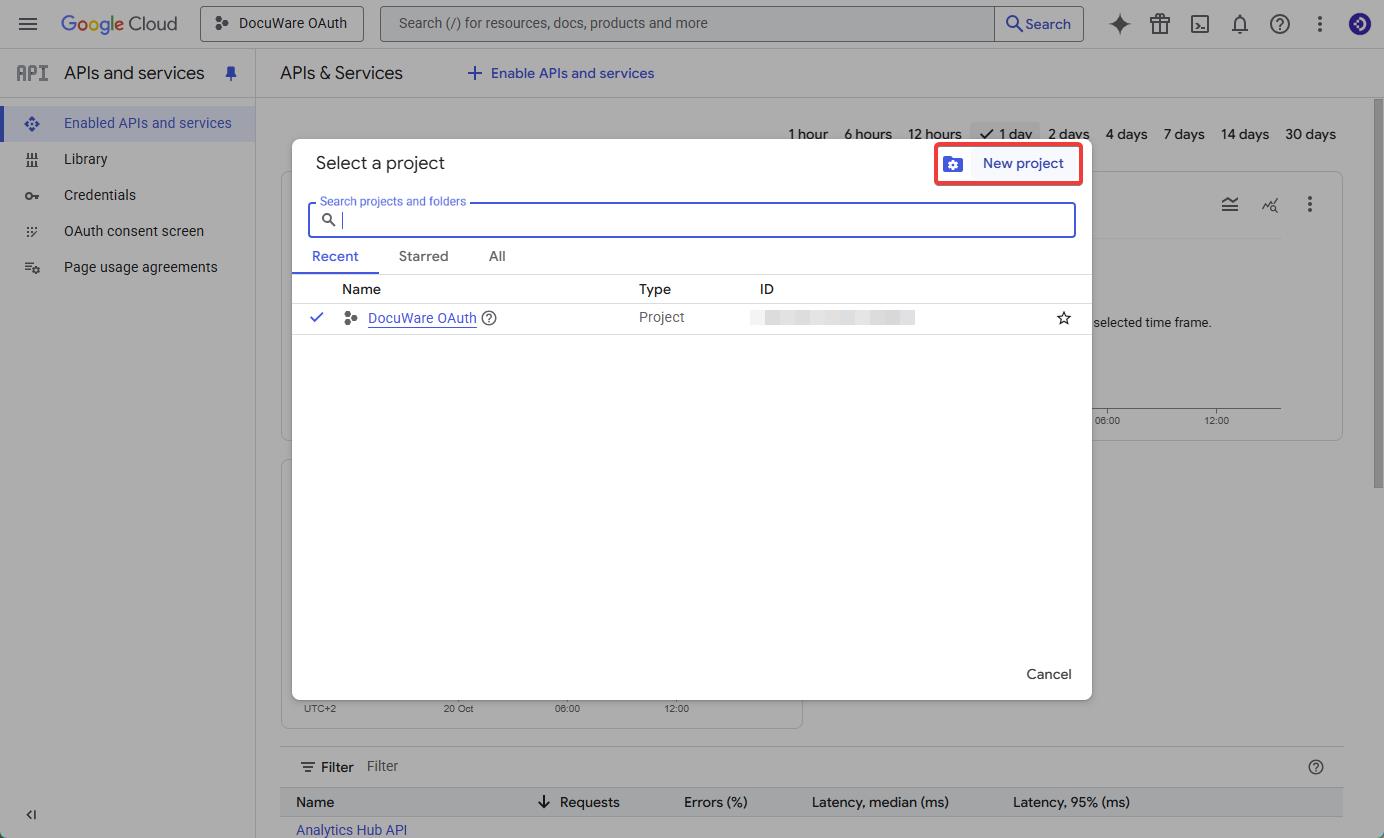
If you have already worked with projects in the Google Console, it will look like this:
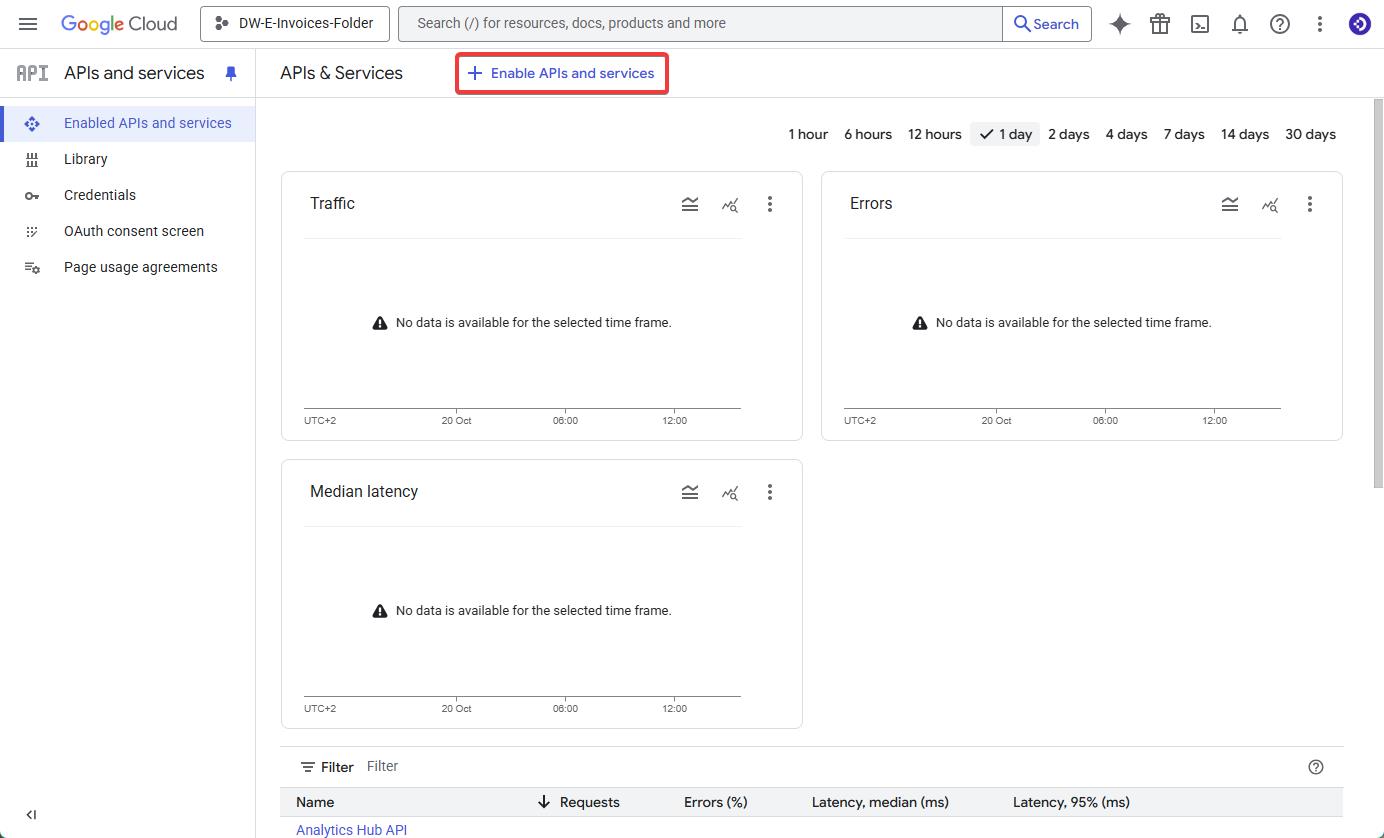
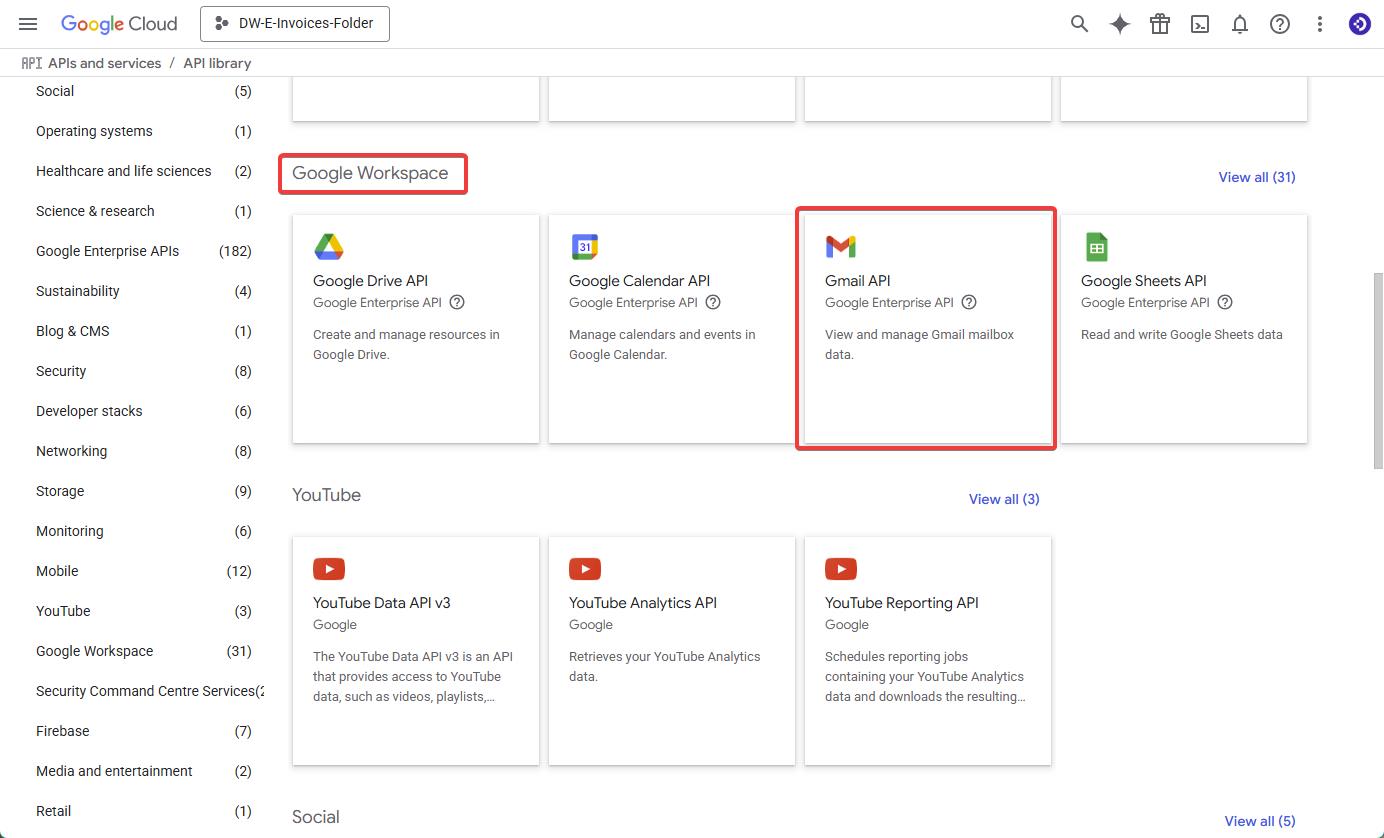
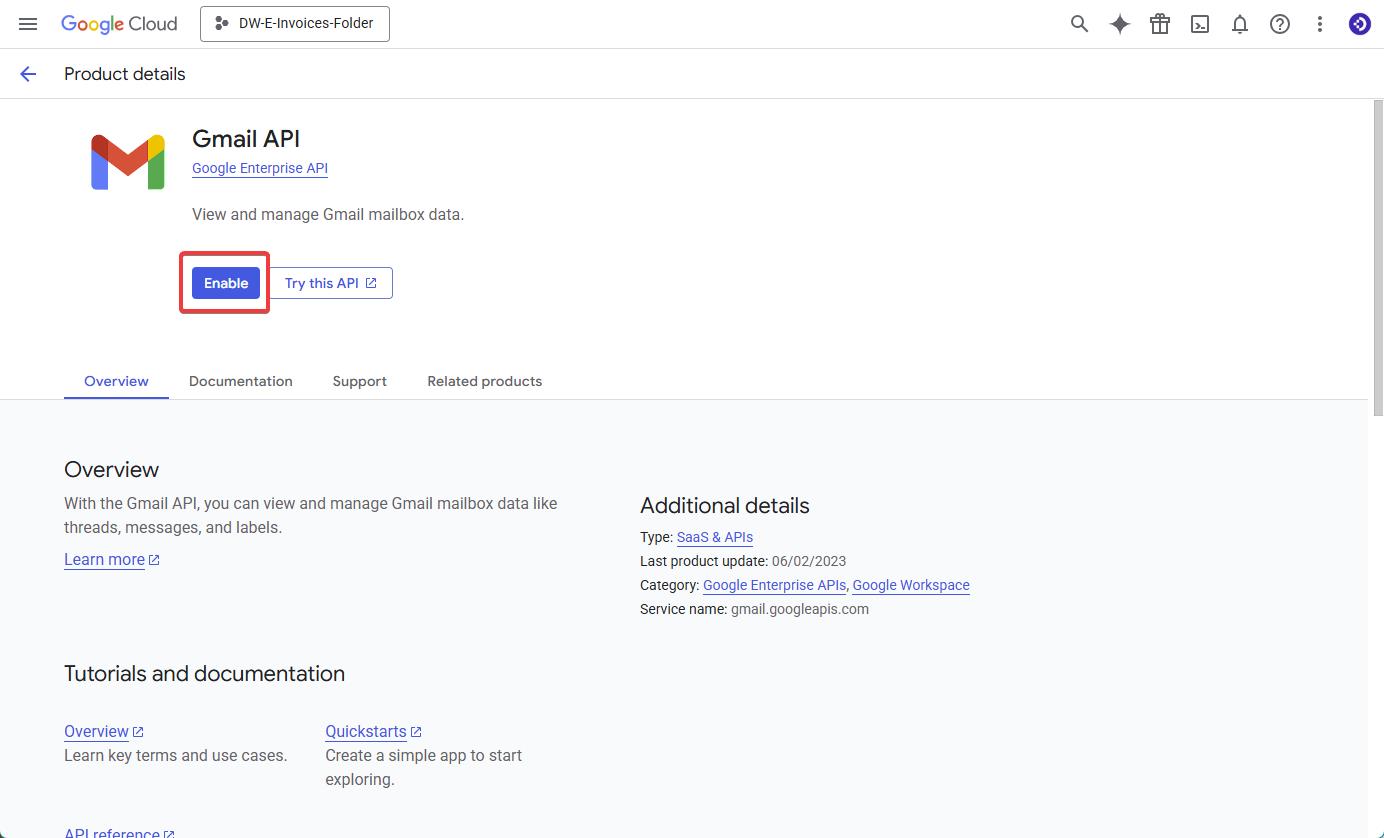
3. As soon as the project is created, click on "Enable APIs and Services", select the Gmail API and enable it.
⇓
⇓
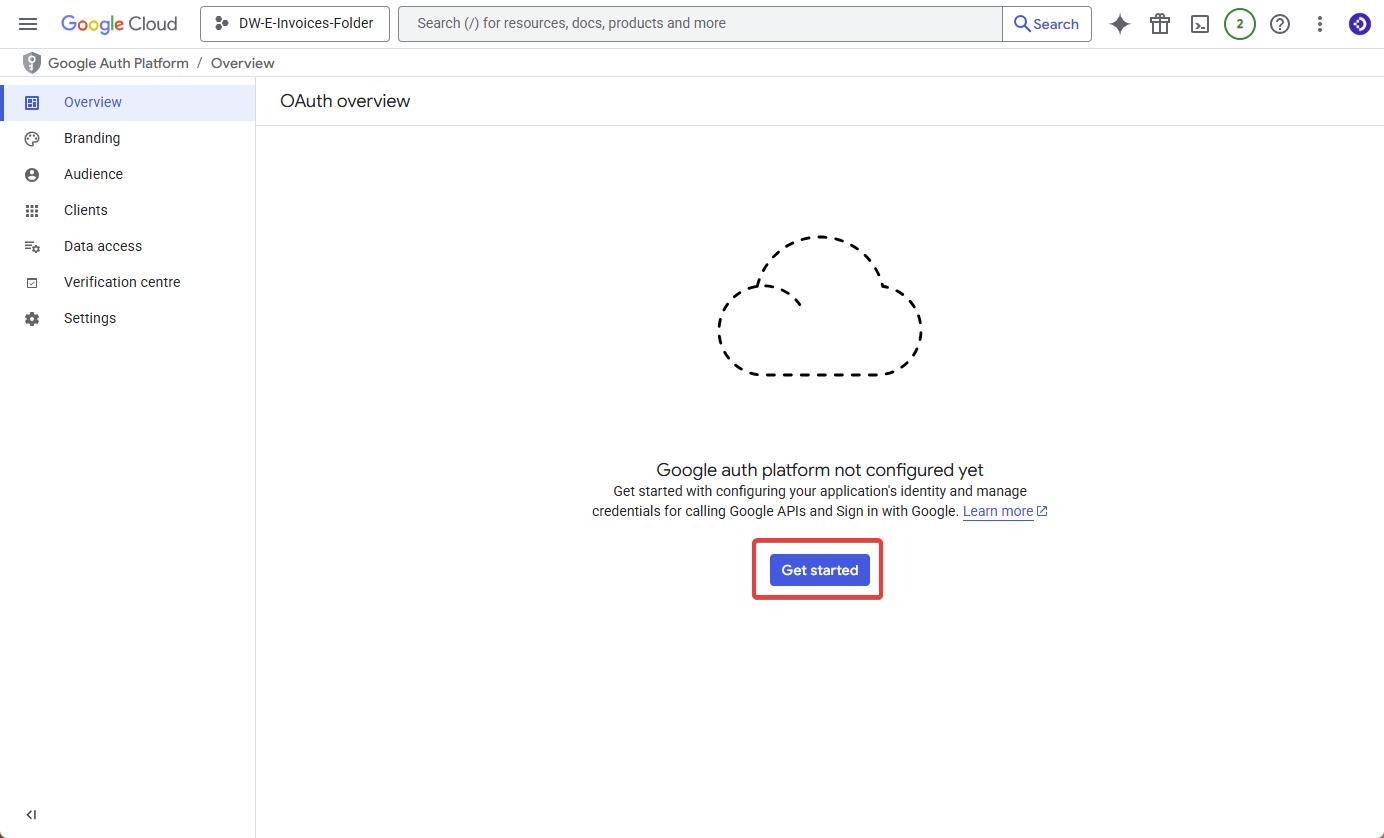
4. Switch to the “OAuth consent screen” and click on "Get started".
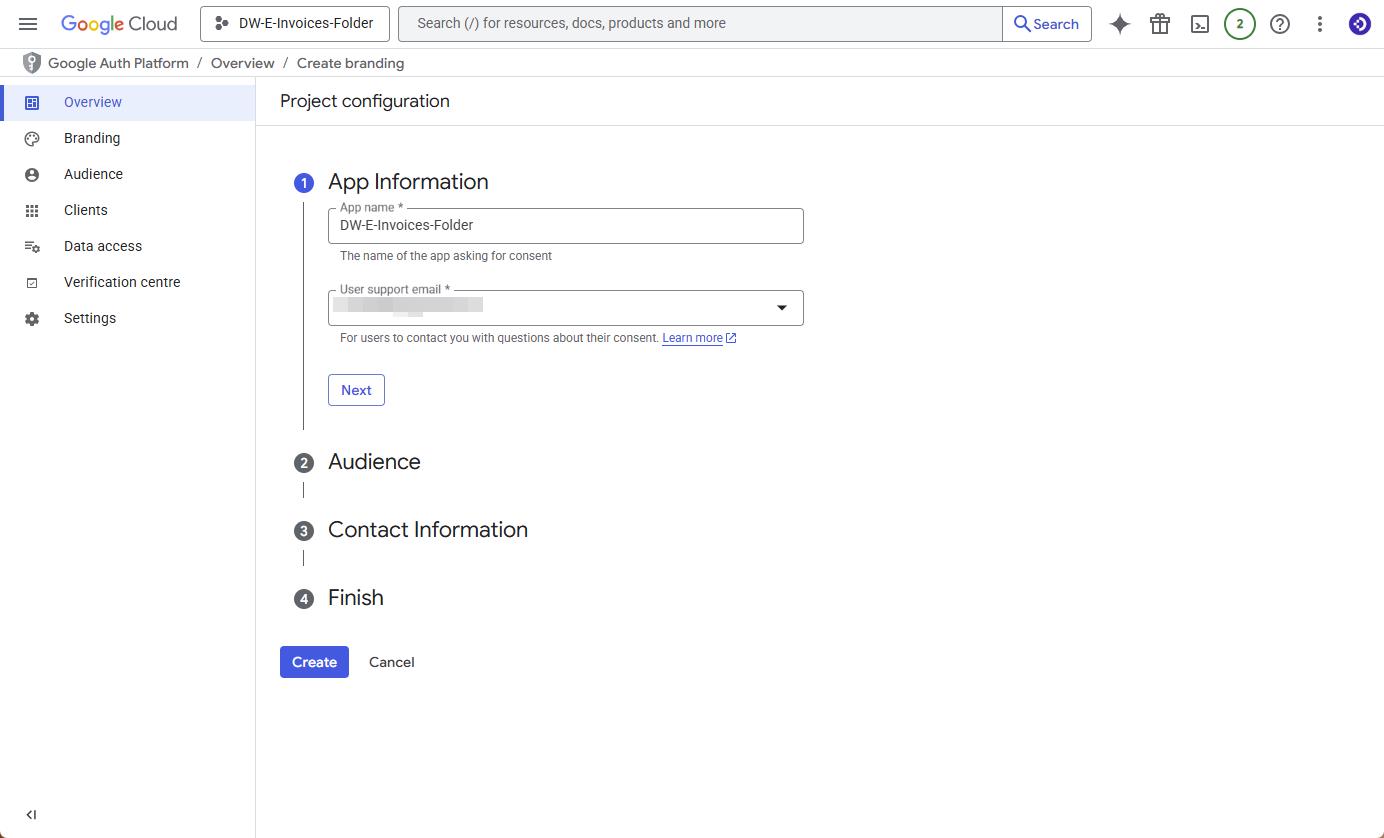
5. On the next page, complete the app registration. We strongly recommend that you enter the folder name that will later be monitored in the App Name field so that you can better distinguish between the various projects and apps within your Google tenant. Click Next.
6. In the Audience tab, please select “Internal” so that your app registration does not have to be verified by Google.
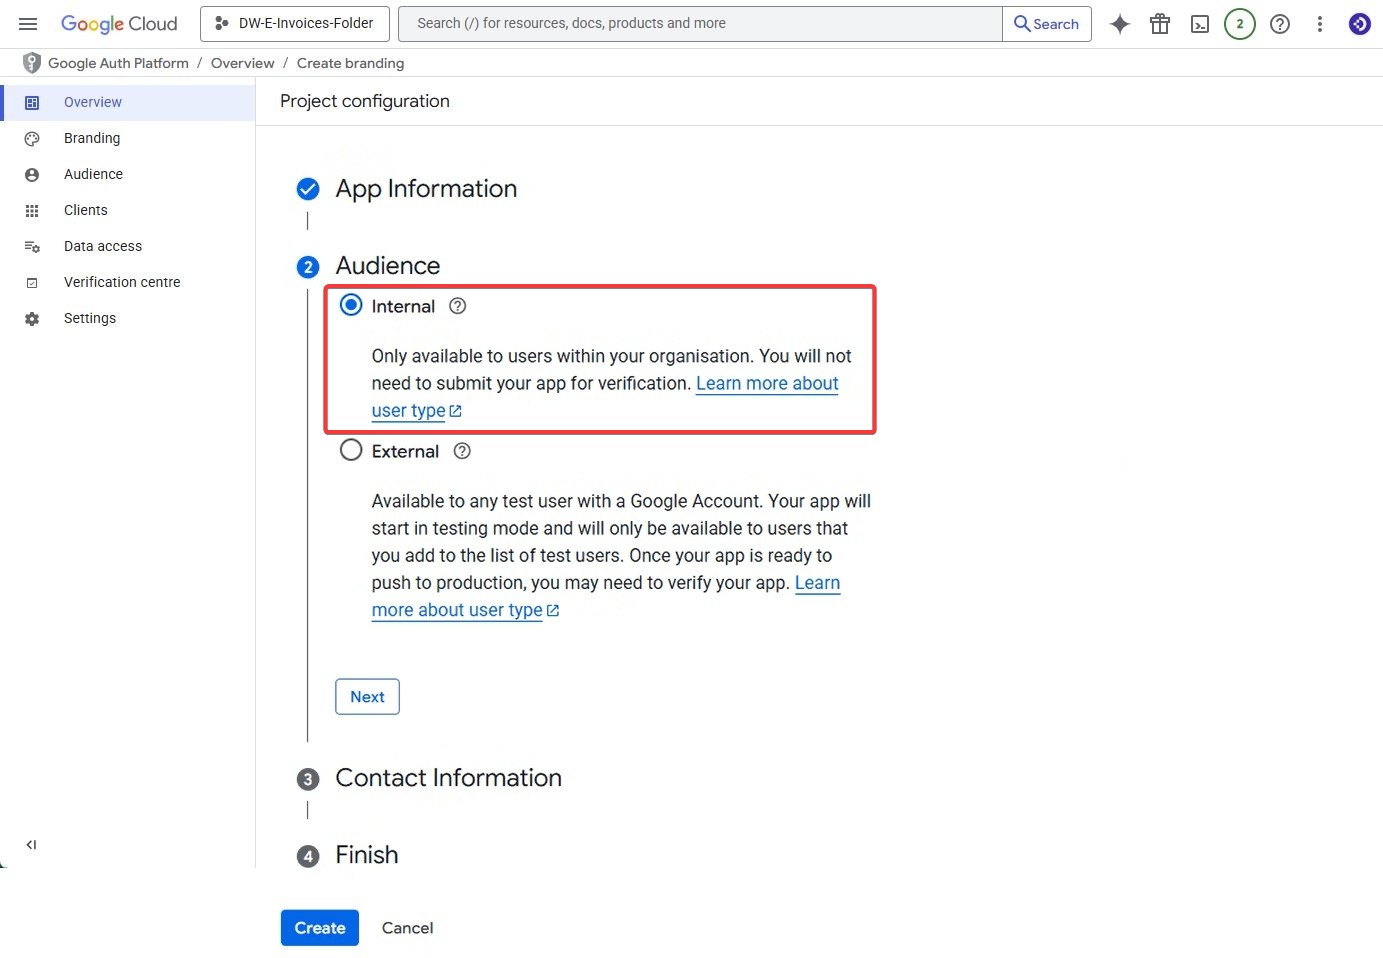
Click Next to enter your contact information for Google. Click Next again to agree to the Google API services user data policy. Create your Google OAuth app by clicking Create.
Important: At the end of the app information page, Google asks for the e-mail address of the developer contact. This does not refer to DocuWare as the developer of Connect to Mail, but to the creator of this app, i.e. you. So please enter your e-mail address here, also because the recipient of this address will be informed if there are problems with the project you have created and this Google OAuth app. Click on Save and Continue.
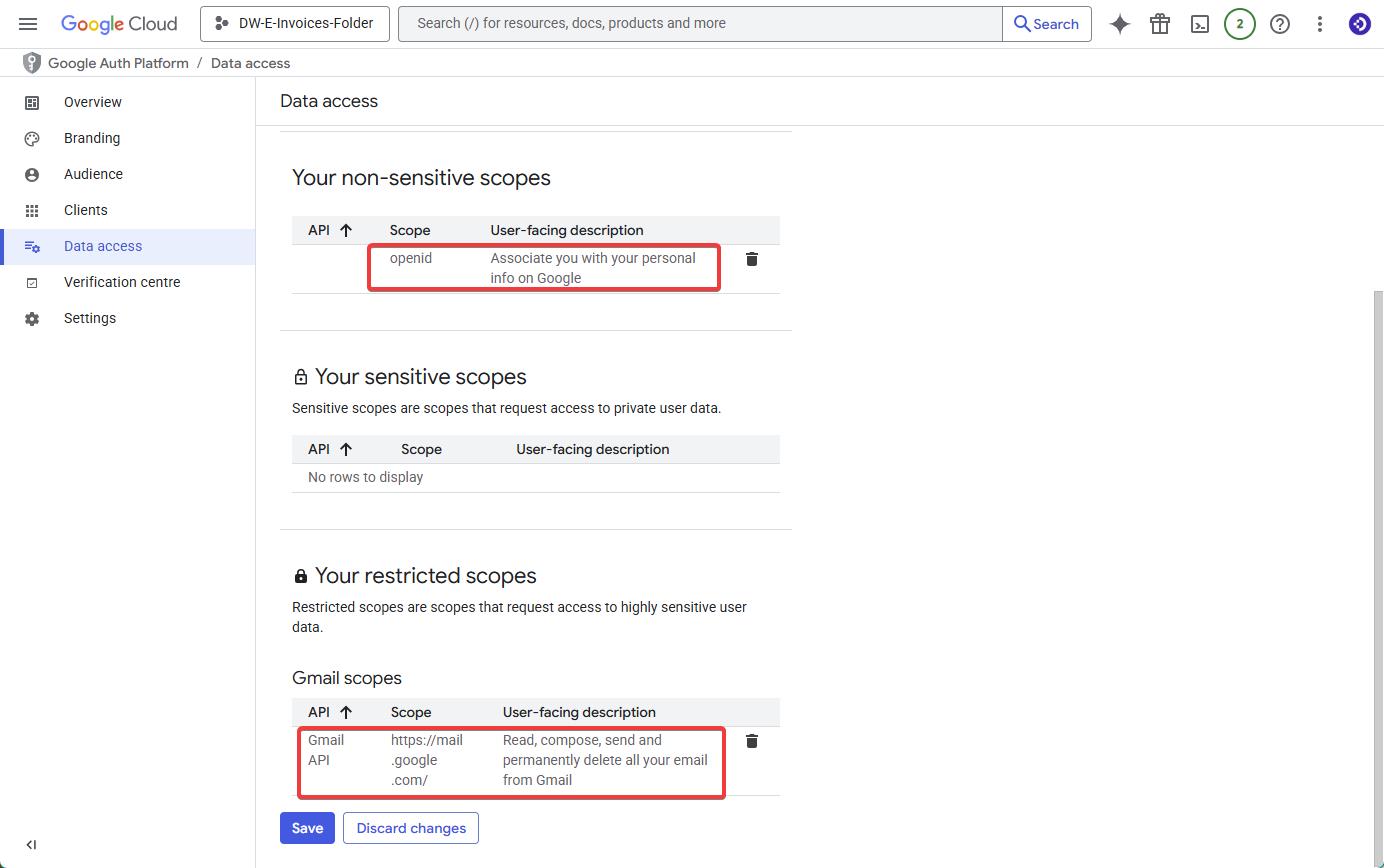
7. Next, we define the scopes for the app we just created. Click on “Data access” and then on “Add or remove scopes.” Select ‘openid’ from the list and the “Gmail API” with the following permissions: Read, compose, send, and permanently delete all of your emails from Gmail.

Check that the scopes are displayed correctly and click Save.
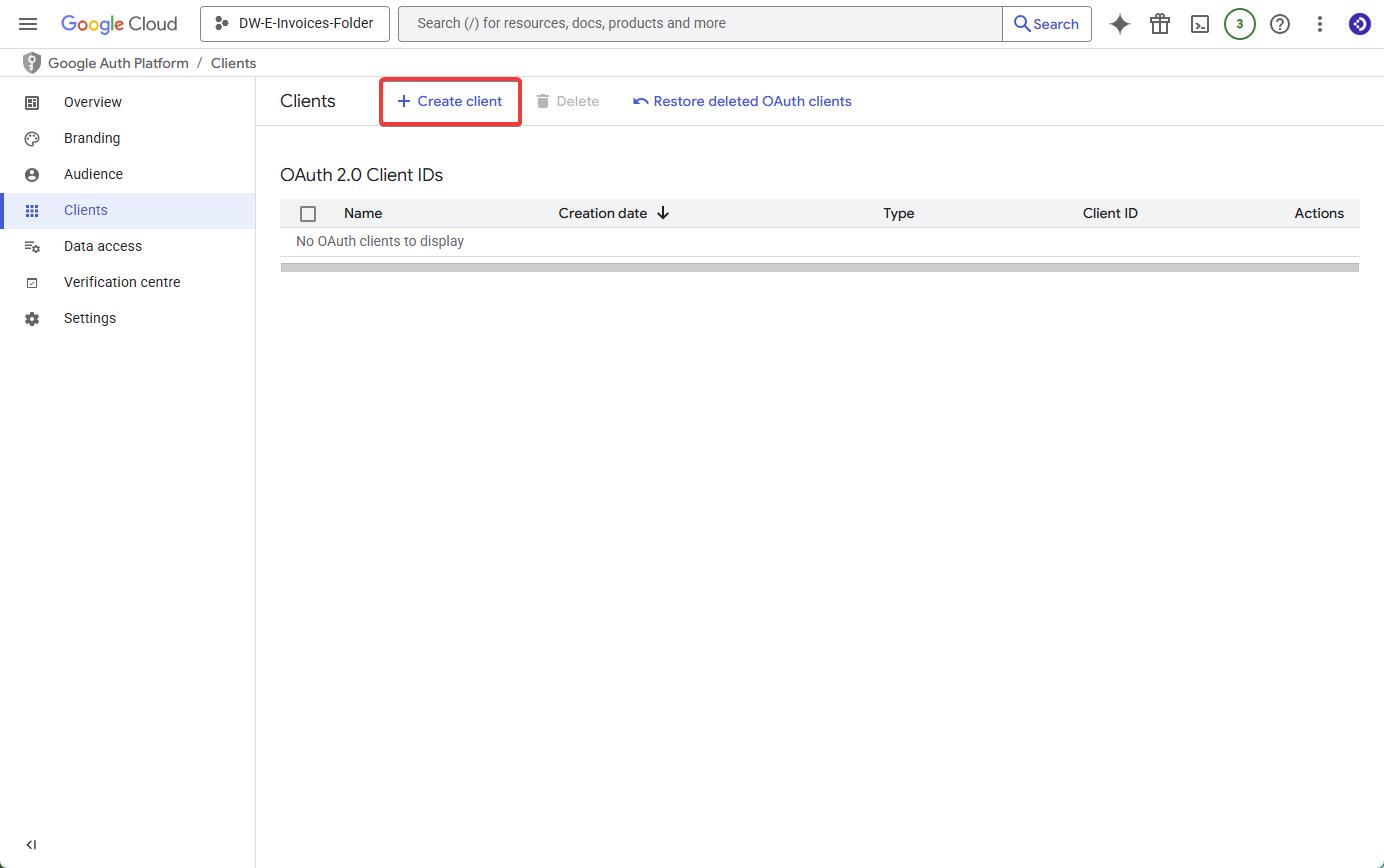
8. Under the Clients menu item, we will now create an OAuth client connection. Click on Create client.
Select Web application as the Application type, choose a meaningful name (we recommend a combination of the email address and the folder to be connected, e.g., Invoices-South-West-Inbox) and finally, add the Authorized Redirect URI.
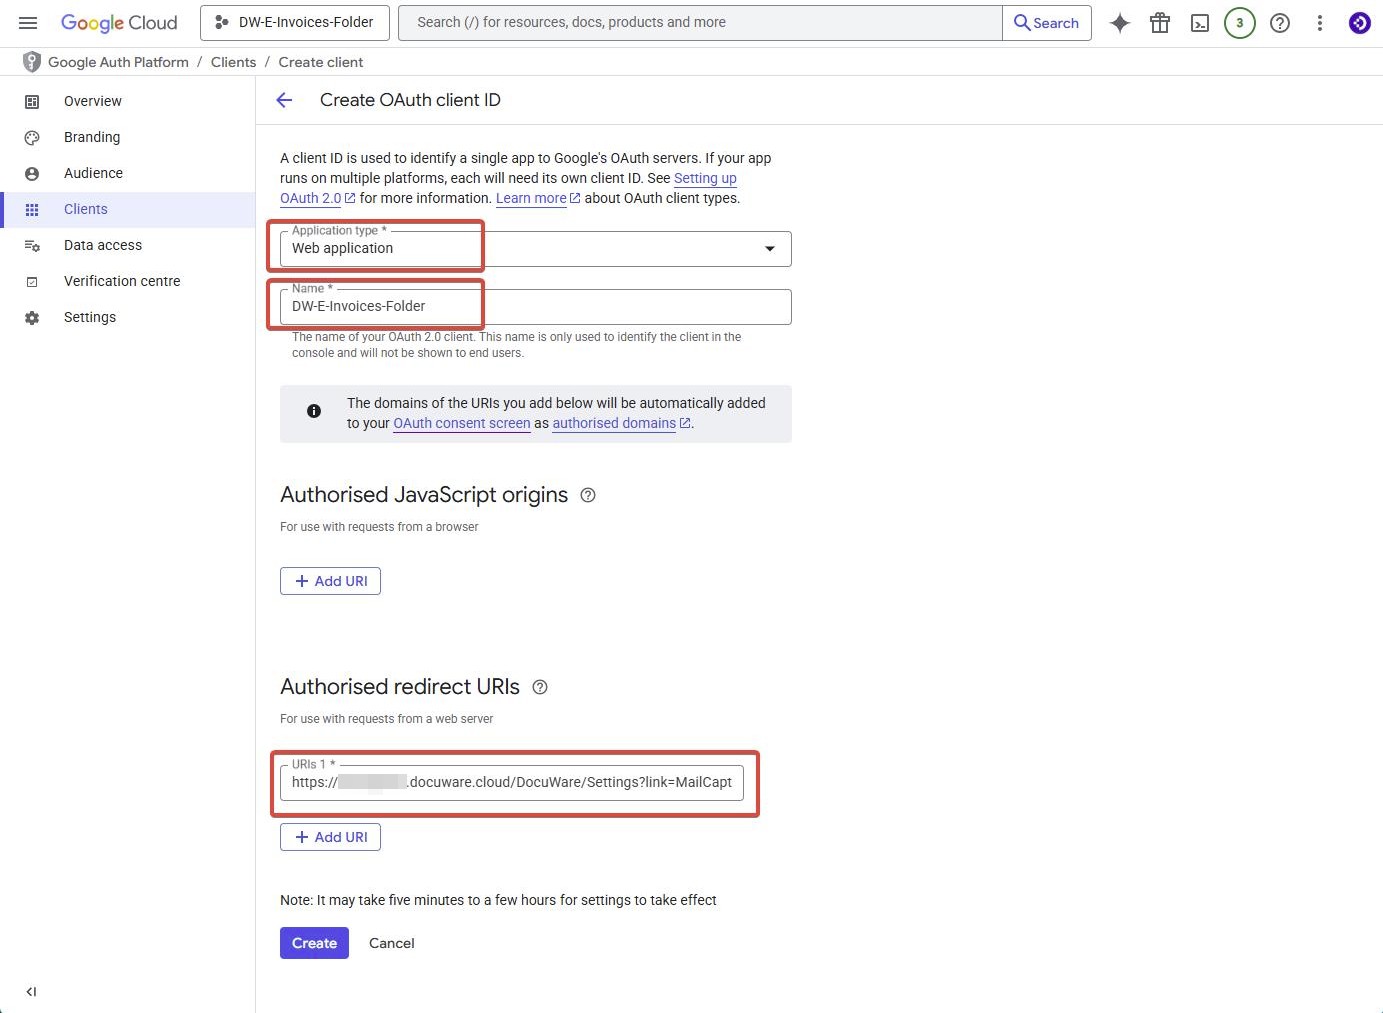
Important: As with Microsoft OAuth, the redirect URI is your DocuWare Cloud URL + the suffix “/DocuWare/Settings?link=MailCapture”.
For example: https://your-dw-cloud-name.docuware.cloud/DocuWare/Settings?link=MailCapture
9. Finally, note the Client ID, the Client Secret and the Redirect URI for the configuration within DocuWare. The Redirect URI must be written identically in Google and DocuWare, otherwise a mismatch error will occur.
We recommend downloading the JSON file. You can store this in the DocuWare configuration and all settings from Google are then automatically transferred to the DocuWare configuration.
10. Go to the DocuWare configuration page and select “Mail services”, click on “New Mail service” and select IMAP. Name the new mail service as the OAuth Client ID was named in Step 9. above, so that you will always know which mail service belongs to which Google Client ID.
11. In the new window, click on “More options” and select “Use IMAP OAuth Authentication". Make sure that Google and not Other is selected there.
12. You can now upload the JSON file from Google and the configuration is complete. You can also upload the data manually, but we do not recommend this as it usually leads to more errors.
If you do want to configure the service manually, you will need these values in addition to the values noted in step 9:
|
Application (client) ID |
noted in step 9 |
|
Client Secret Key |
noted in step 9 |
|
OAuth 2.0 authorization endpoint |
|
|
OAuth 2.0 token endpoint |
|
|
Redirect URI |
https://your-dw-cloud-name.docuware.cloud/DocuWare/Settings?link=MailCapture |
|
Scope |
|
|
Host |
imap.gmail.com |
|
Port |
993 |
13. Now connect your Google Mailbox with Connect to Mail. To do this, open “General Email” on the DocuWare configuration page. Select or create a new storage configuration and then click on “Connect to email account”.
14. In the new window, you must now log in to the Google account once. It is possible that Google will display a security message like this:
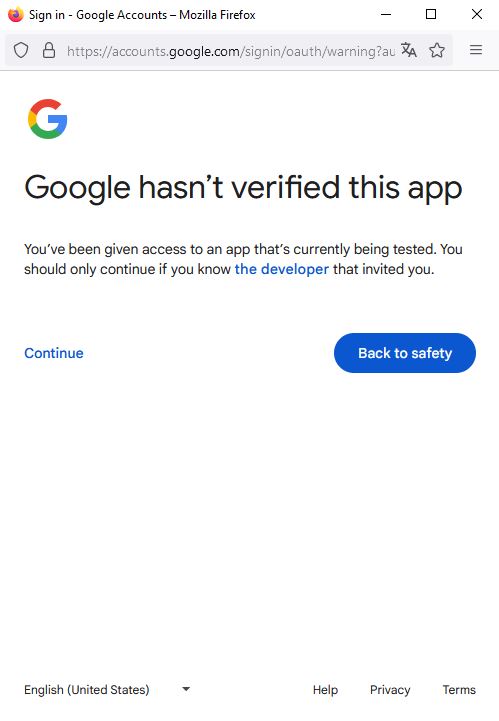
Ignore this message and click on Continue.
15. In the next window you have to give DocuWare the rights to access the mailbox. Click on Continue.
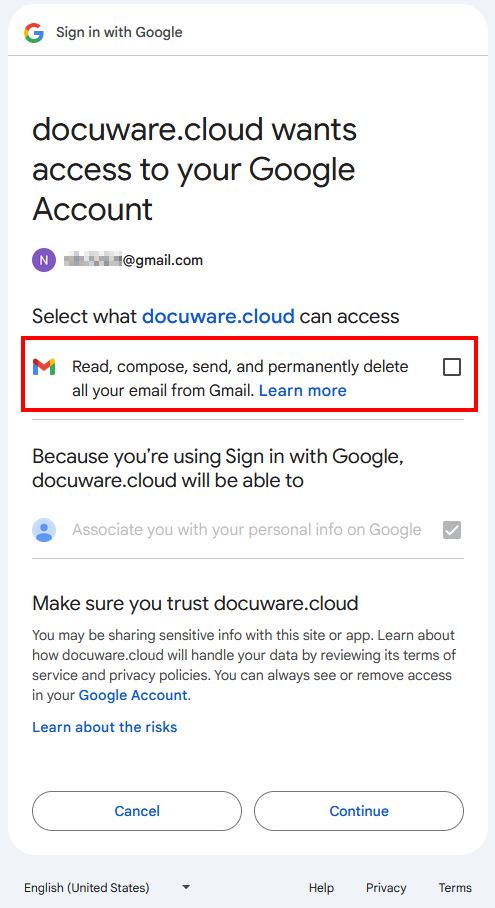
If you can now see your Google Labels in the DocuWare Connect to Mail Configuration, the configuration is complete.
Important notice:
As mentioned at the beginning of this KBA, Google does not allow you to log in to your mailbox multiple times with a set of client ID + client secret in order to monitor different folders. To monitor additional folders, you must create a new project on the Google API page and repeat the steps described above. Google requires a new configuration for each folder monitoring.
To avoid confusion, we recommend naming these IDs after the folders you want to connect in DocuWare.
Then create a new mail service in DocuWare, preferably also with the folder in the name, and upload the new JSON file there.
More information about OAuth:
https://knowledgecenter.docuware.com/docs/mail-services?highlight=oauth
https://developers.google.com/identity/protocols/oauth2/javascript-implicit-flow
https://developers.google.com/workspace/guides/configure-oauth-consent