

Behavior:
You are setting up a DocuWare Workflow with the purpose of calling Intelligent Document Processing (IDP) from Natif.ai.
The PDF documents aren't processed within the default time range of Workflow Designer (Web-Service timeout = 60 seconds) and Natif.ai (processing timeout = 120 seconds).
With the following guide, you'll be enabled to set up a DocuWare Workflow calling the Natif.ai process asynchronously.
ATTENTION: Intelligent Document Processing currently provides support for PDF documents!
E-Mails containing PDFs have to be converted to PDF before sending them to the Natif.ai endpoints!
All supported file-types can be found on the following page: Limitations - Supported File Types
These pages contain crucial information on the following process:
- DocuWare Connect to Intelligent Document Processing
- Processing API Endpoint -
- Advanced Response Handling -
- Fetch Processing Results and Artifacts -
- Synchronous vs. Asynchronous Usage -
Solution:
To process larger PDF documents, the Natif.ai Endpoint requires to be called asynchronously. Within this KBA, you'll find steps that show a default asynchronous DocuWare Workflow.
The "best-practice" DocuWare Workflow completed looks like this:
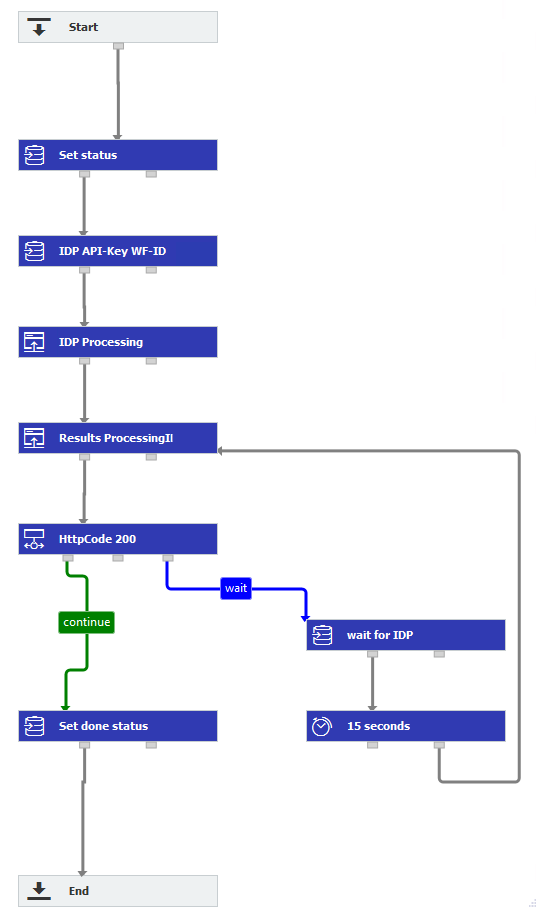
Depending on your process, define your start / trigger condition in DocuWare Workflow Designer accordingly. This isn't the focus of this guide.
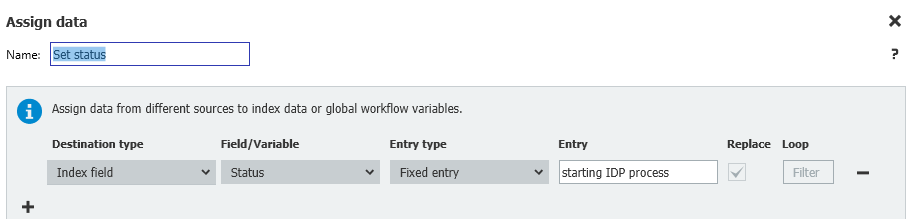
The "Set status" task is a data assignment step to change the index field "Status" of the document, showing that the process has started
Within the next data assignment "IDP API-Key WF-ID" you will define the fixed values of the Natif.ai API-Key and the Natif.ai Workflow-ID.
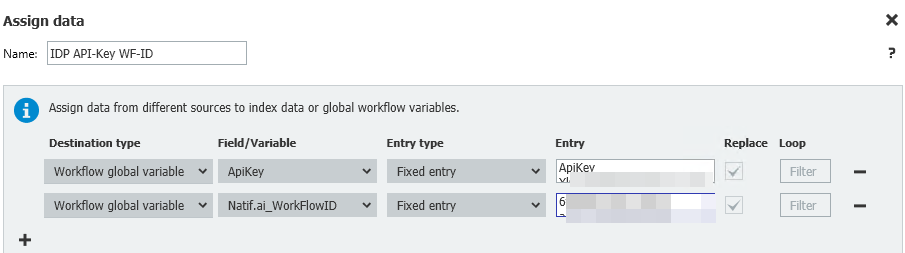
In the above screenshot you can see that the API-Key requires the prefix "ApiKey" within the field value, paste the complete Key into the field after this prefix. The Workflow ID of Natif.ai can be inserted as is into the field.
If you haven't created an API-Key in Natif.ai yet, please create a dedicated key for your process.
You can find an overview of all API-Keys on the page https://{yourNatifAI_Portal}.natif.ai/api-keys
The Natif.ai Workflow ID can be found after selecting your defined custom or pre-defined process in the Natif.ai portal. In the "documentation" section, you will be able to see the following.

The highlighted and obscured part is the Natif.ai / IDP Workflow ID, which is required within the DocuWare Workflow.
In the "IDP Processing" step, you'll call the Natif.ai / IDP Workflow via Web-Service. A detailed guide on how to connect an IDP Web-Service can be found here: https://knowledgecenter.docuware.com/docs/connect-to-intelligent-document-processing-with-workflow
The special parts according to the asynchronous guide from Natif.ai can be seen in detail here: Synchronous vs. Asynchronous Usage -
To apply the Natif.ai requirements in the DocuWare Workflow Designer, you'll have to open the "Request" tab of your Web-Service.
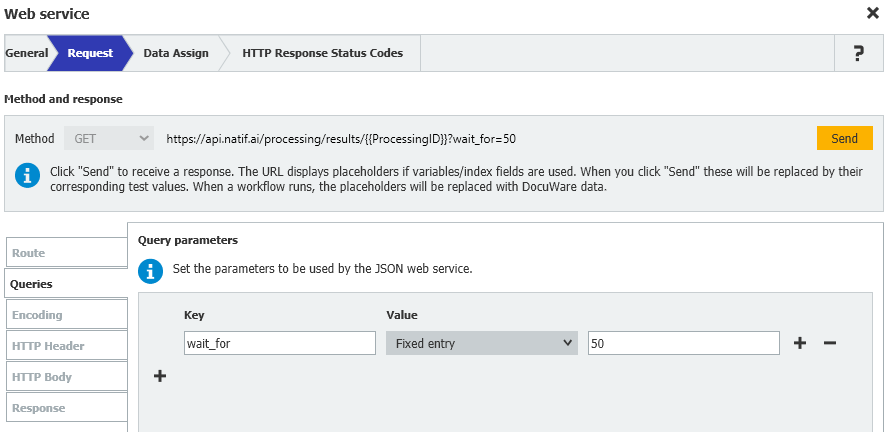
Afterwards, navigate to the "Queries" section of the "Request" tab and set the "wait_for" parameter as a fixed value.
To achieve this, add the key "wait_for" and define a fixed value 0. (as shown below)
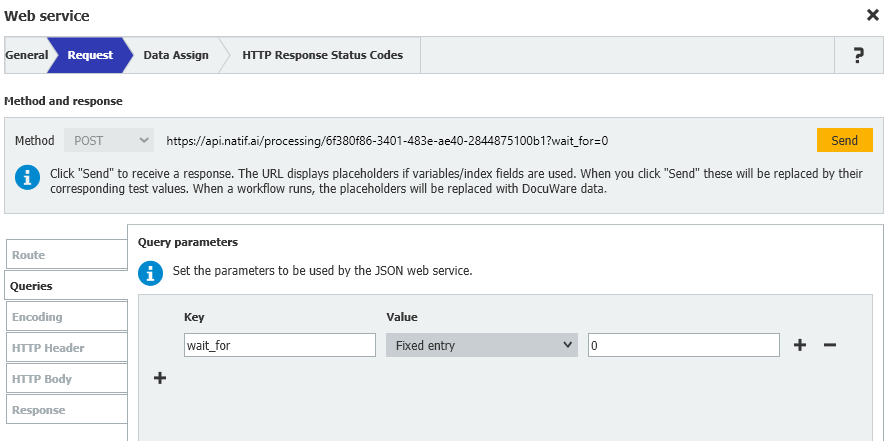
Following this step will enable the Natif.ai Workflow to always return the processing-ID. This ID is required for the following step when you will call the process repeatedly.
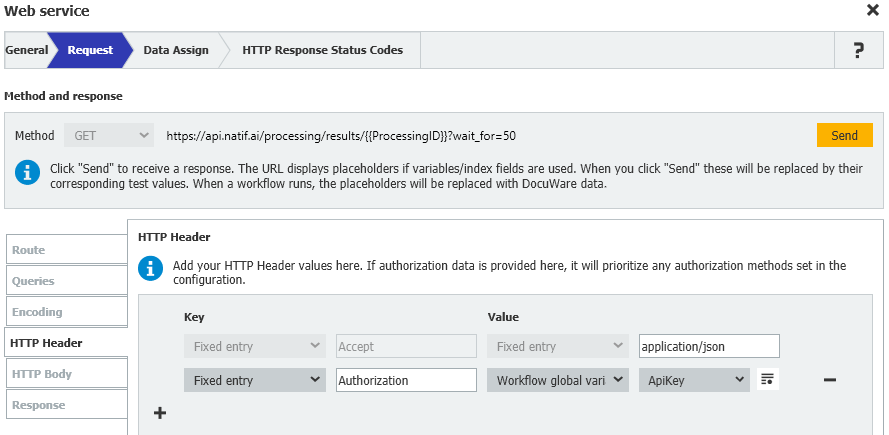
In the HTTP Header section, you'll have to define 3 fixed values. "Accept", "Content-Type" and "Authorization" the values can be seen in the below screenshot.
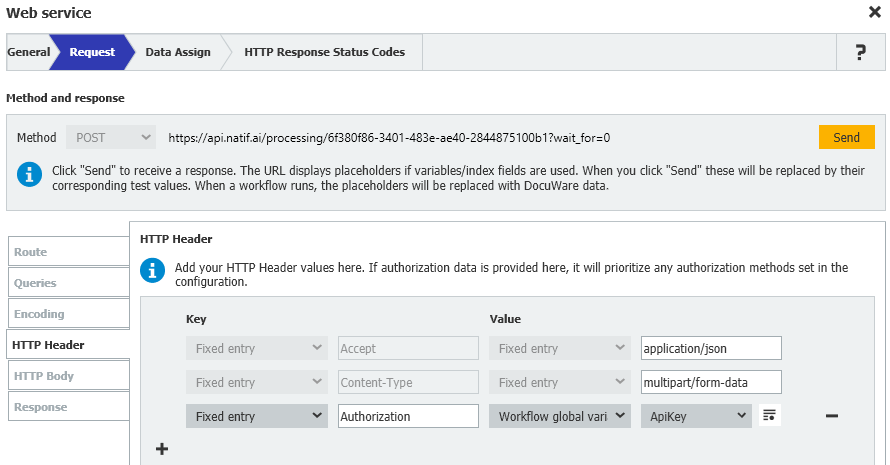
The ApiKey content is taken from the previous data-assign step "IDP API-Key WF-ID".
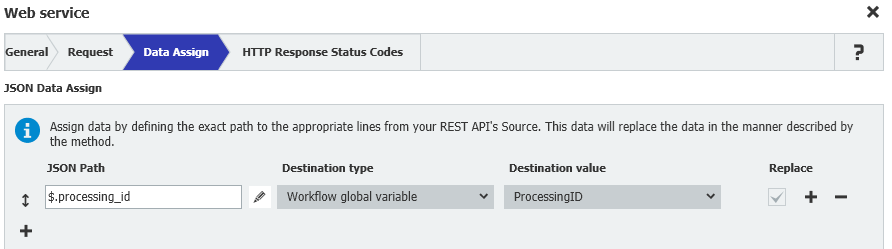
In the Data Assign tab of the Web-Service, you'll have to specify capturing the return value of the Intelligent Document Processing / Natif.ai Web-Service.
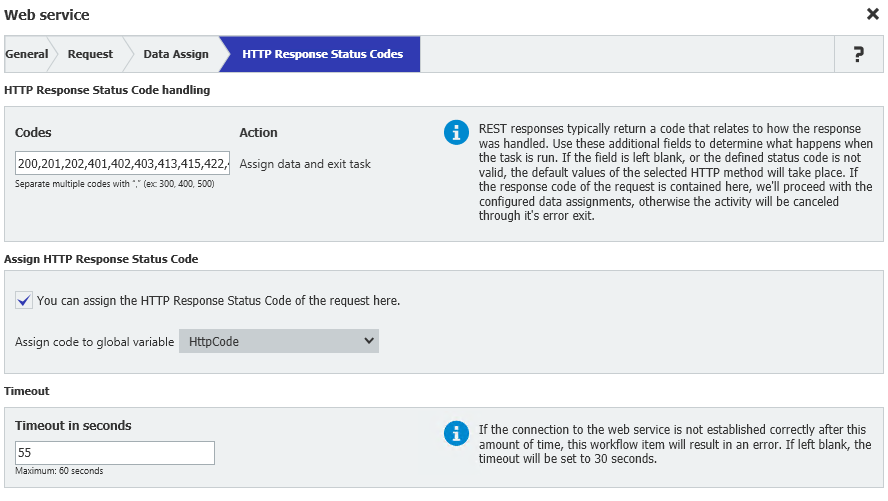
In the HTTP Response Status Codes tab, define all potential Codes "200,201,202,401,402,403,413,415,422,429,500".
You can set the time limit to the maximum 60 seconds or lower.
In the next Web-Service element ("Results ProcessingID"), you'll call the processing endpoint with the "ProcessingID". The ProcessingID is returned by the previous Web-Service "IDP Processing".
Details on this endpoint can be found here: Fetch Processing Results and Artifacts -
This Workflow step will be repeated until the document was completely processed by Natif.ai!
In the below screenshot, you can see the call to the dedicated endpoint with the respective ID.
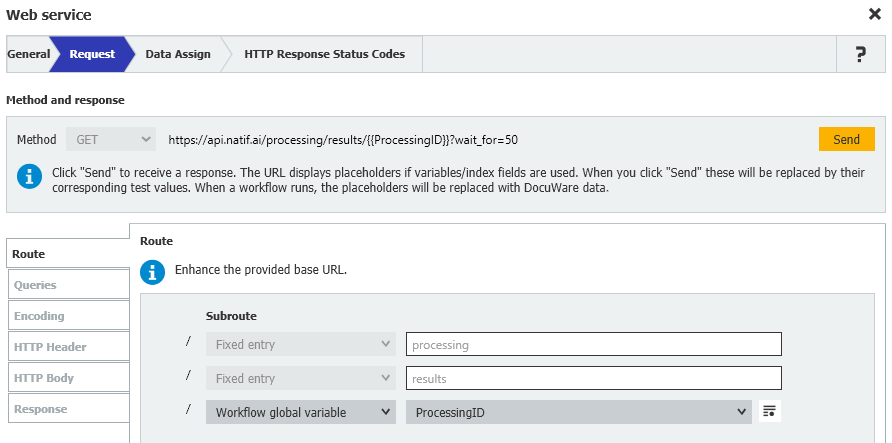
In this element, define the "wait_for" key within the Queries section to be lower than the DocuWare Workflow Designer timeout (< 60 seconds).
The HTTP Header tab will require the keys "Accept" and "Authorization".
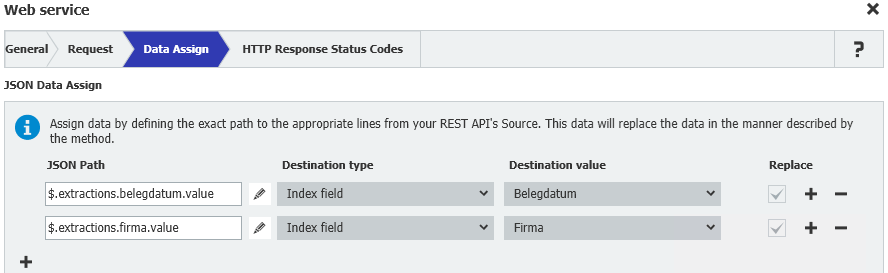
Within the "Data Assign" tab, define the values you want to extract from Natif.ai and place into DocuWare.
The following values, shown in the screenshot, are only dummies and can be enriched according to your process!
The last tab "HTTP Response Status Code" should have the Codes set to only "200" and the time limit set to the maximum of 60 seconds.

With the condition part of the flow ("HttpCode 200") we'll evaluate if the HTTP code of the previous Web-Service call ("Results ProcessingID") was "200", if this applies the Workflow will exit the loop.
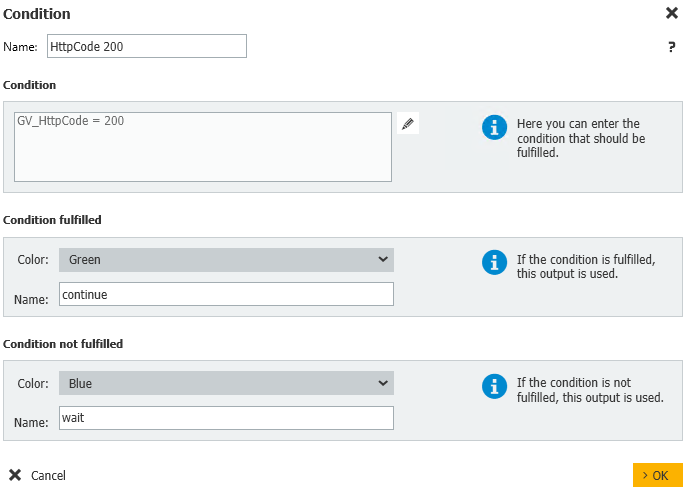
Should that not apply, we'll loop back until the Natif.ai Workflow has completed processing the document.
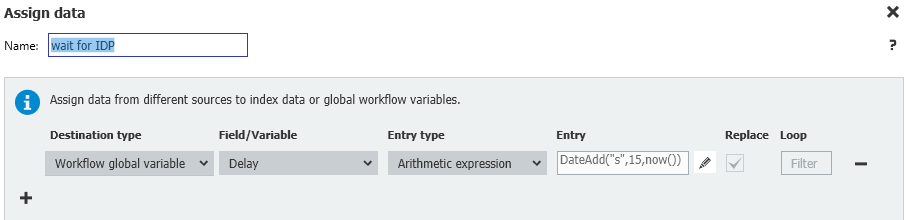
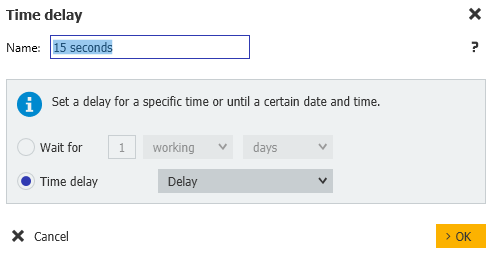
To enable a custom wait loop, you'll have to define a global variable "Delay" of the "DateTime" type. Please choose an appropriate waiting period.
In the following screenshots, you can see how to enable the custom wait operation. In this example, we chose to add 15 seconds to the current time.
Avoid setting the value below 10 seconds, as this will only cause the flow to iterate more frequently!
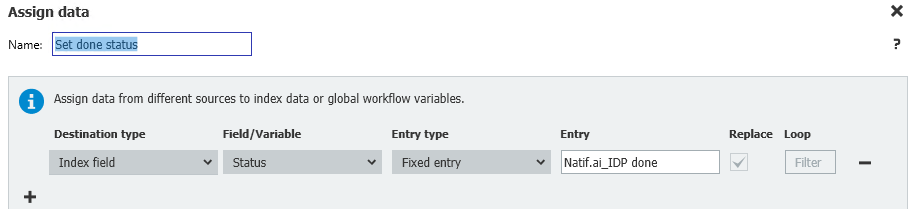
In the "Set done status" you can provide an update to the document of the DocuWare Workflow Designer flow. This will enable the users to see clearly if the process has completed.
After following this "best-practice" guide, you should be able to process large PDF documents with DocuWare Workflow and Natif.ai.